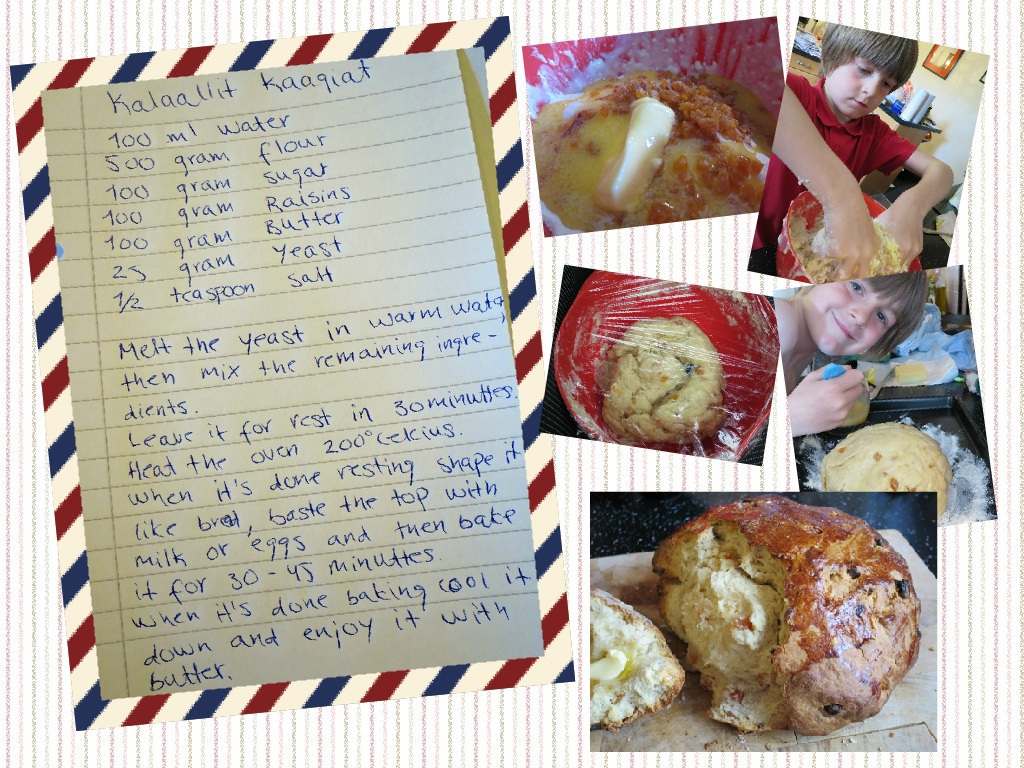
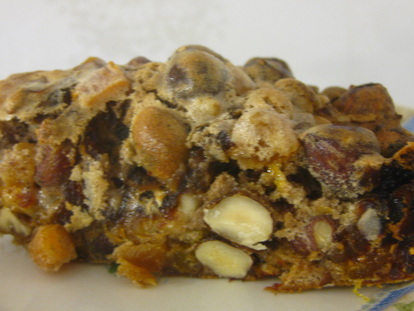
The lovely Paarnaq from Greenland sent us a recipe for "Greenlander's Cake" - Kalaallit Kaaqiat. It's essentially a yeast loaf with dried fruit - we got the amount of water wrong in our first attempt and had to start again. For our second attempt, we had run out of raisins, so we used chopped apricots instead, which worked really well, too!
0 Comments
On Saturday, the postman brought post from Spain. Toby had asked Inés, Miguel and Javier for a recipe, and they sent a recipe for a Spanish tortilla that was so simple that Toby cooked it nearly all by himself - after harvesting our tiny potatoes! The recipe is in the picture, and we decided to include some pictures of the cooking and harvesting, too.
We found out about bannock while we researched the Northwest Territories for Toby's letter to Kaylie-Ann. It's a kind of bread, and although we didn't cook ours over the open fire, it was still very yummy. Apparently, you can take the dry ingredients with you, all mixed up, when you go camping, and then you just add water until you have a stiff bread dough, wrap it round a stick and cook it over the open fire.......we are *so* going to try that. Here's the recipe we used: 1 cup flour 1 tbsp sugar 1 tsp baking powder 1 pinch of salt Mix dry ingredients and add enough water to make a stiff dough, then shape into thick scone-style pancakes and fry in a little oil until they are done. Ours took about 8 minutes or so......but the stick method sounds way more exciting!!! Tatjana told us about these very yummy sweets - here is what she said: Here's one of my favorites: Melt 125 gr butter, 100gr powdered sugar and 200 gr dark chocolate. Take candy paper cups, put a cherry in each (we use cherries from '' slatko'' , a traditional thin fruit preserve but you can just boil cherries and sugar until it gets the consistency of syrup) and fill in with melted chocolate. Refrigerate. As luck would have it, we were hoarding a couple of jars of sour cherry compote, which is not easy to get hold of in the UK, and which sounds like it's very close to the Serbian "slatko" Tatjana mentions. Looking at Google images, there are lots of ways to decorate these, we went for the messy "let's just plop them in the paper cups" approach. Jenn suggested we have a go at making Buckeyes, and several other people said that they make them, too. Here's the recipe we used: 3/4 cup peanut butter 1/2 cup butter, softened 1/2 teaspoon vanilla extract 3 cups confectioners' sugar 2 cups semisweet chocolate chips Mix all ingredients apart from the chocolate, and roll into bite-sized balls (it feels a bit like playing with wet sand!) Pop a cocktail stick (we actually used half a cocktail stick) into each ball, this will be your "handle" later. Pop into the fridge for half an hour (if you want, use that half hour to write a letter, like we did!) Melt the chocolate chips, then take out the dough balls, swirl them in the chocolate and put onto wax paper to set. Once you've done them all, put them in the fridge to set properly. Lee from Pennsylvania shared this recipe with us - we are always a bit scared making "old family recipes", just in case they don't end up looking anything like how they should. All we can say is that these are very yummy! We filled a jar to give away, and have another one left over to eat ourselves. Thanks so much, Lee! Here's the recipe, in Lee's own words: This is one that I do every year, it can't be Christmas with out them. This recipe has been made in my family for as long as anyone can remember. and of course they are my fav! They are also super easy. We never knew the real name so they are called Tiger's cookies (that was my nick name as a child) 3 cups oatmeal, 3 Tablespoons baking Cocoa powder, mix them in a large bowl and set aside. now boil 1/2 cup milk, 2 cups sugar,1/4 cup butter once it has come to a rolling boil add 1/2 cup peanut butter. take off heat add the dry ingredients. Have a baking sheet covered in wax paper, drop teaspoons of the dough onto it, let cool and enjoy once they have cooled. To store keep in a tin. Hope you like them as much as I do and still enjoy making them with my family. We made this as part of our "food as a present" idea - since we started to cook and bake our way around the world, we have so much cake in the house, we need to share it! So, these coconut ice cubes, we made to give away. We used: - 1x 400g tin of evaporated milk - 400g icing sugar - around 330g of desiccated coconut (we say "around", we had a packet, which was 200g, then a "rest of a packet", which was maybe 40g, that made the texture too sticky, and when Mummy looked in a panic to see what we could use, we found another half-used packet of desiccated coconut, and threw in enough so the mixture handled like a dough. You see, we are well prepared and think everything through!) - a few drops of red food colouring (optional) Mix the evaporated milk, icing sugar and coconut in a bowl until you have a dough (tip, the longer it "sits" or the warmer it gets, the stickier it gets). Divide in two and work a few drops of red food colouring into one half (possibly better than we did, unless you like the mottled look). Cover a work surface with cling film, dust both film and rolling pin with icing sugar (frequently, in the case of the rolling pin!) and roll one half of the dough into a...well, oval. Repeat with the other half, so you have two separate, rolled out shapes (preferably the same kind of shape). Flip one so it's on top of the other, and roll with a rolling pin a couple of times (we liked doing this with the cling film still attached, it made it easier. You are now supposed to have a two-toned oval, roughly an inch thick. If, like us, you have something a lot thinner (oops!), peel off the cling film, fold in half and gently roll out again to make the folded bits stick to each other. Leave uncovered for several hours (we waited five), then cut into cubes. They'll still be a bit sticky from the other side, so flip them over and leave to dry a bit more. Feel free to nibble on off-cuts as you go along. Enjoy! Several people suggested that we make Brigadeiro, and you were all absolutely correct, they are yummy! One 14oz can/tin of evaporated milk didn't look like much, but it made an absolute ton of Brigadeiro! Recipe: One 14oz tin of evaporated milk (about 400g) 1 tbsp butter 3 tbsp unsweetened cocoa Add all ingredients to a pan and reduce on a medium heat for about 10-15 minutes, until you can see the bottom of the pan when you drag a wooden spoon through it. Leave to cool until you can handle it, then roll into small balls between well-buttered hands and roll in chocolate sprinkles. We didn't stray too far from home for today's recipe, but we had never made Welsh Cakes before, and boy, are they yummy! Thank you so much, Azrael, for sharing the recipe! Ingredients 225g/8oz self-raising flour 110g/4oz butter 1 egg handful of raisins milk, if needed 85g/3oz caster sugar extra butter, for greasing Preparation 1. Rub the fat into the sieved flour to make breadcrumbs. Add the sugar, dried fruit and then the egg. Mix to combine, then form a ball of dough, using a splash of milk if needed. 2. Roll out the pastry until it is a 5mm/¼in thick and cut into rounds with a 7.5-10cm/3-4in fluted cutter. 3. Take a heavy pan or griddle. Rub it with butter and wipe the excess away. Put it on to a direct heat and wait until it heats up, place the Welsh cakes on the griddle, turning once. They need about 2-3 minutes each side. Each side needs to be caramel brown before turning although some people like them almost burnt. 4. Remove from the pan and dust with caster sugar while still warm. Claudia posted a link to a whole page of Maltese recipes - we had a look, and although we are a few days late, we wanted to try Torta 'ta San Martin, in honour of Saint Martin's Day, which is on the 11th of November. We adapted the recipe, so here's what we did: Ingredients:
1. Pre-heat the oven to Gas Mk 4 /180c 2. With an electric whisk beat the egg-whites until they are fluffy 3. Add the yolks, sugar, flour and milk 4. Combine them well and then fold in the dates, figs, nuts, and apricots 5. Pour the mixture into the greased tin and bake for 30 minutes. 6. Bring it out, leave it in the tin for ten minutes until it has steamed off and then turn it onto a wire rack to cool. ...this is definitely the most fruit and nuts we have ever put in a bread, and it tastes absolutely delicious! |
AuthorThis blog is mainly a way to keep track of our recipes - for day to day updates, please check out Toby's Facebook page: https://www.facebook.com/writingtotheworld Archives
May 2018
Categories
All
|