Do you have a special way of painting Easter eggs?
| www.writingtotheworld.com |
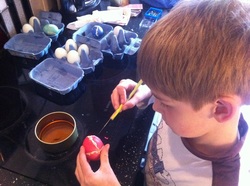
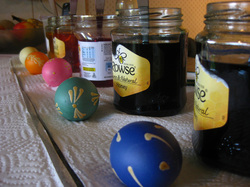
 It has been a long time since we blogged, and we have much to tell the world, especially about the amazing holiday we went on. But first of all, let us wish those who celebrate it a (belated) Happy Easter. In our family, we have one Easter tradition that goes back at least six generations, and that has its roots in Eastern Europe; and that's the painting of Easter eggs. It is called "Pysanky", or "drop-pull method". You mark the egg with hot wax, before dying it batik-style. Take the egg out once the colour you want has been achieved, then paint more wax on, trapping that colour. Dye again, then repeat if you want. At the end, you carefully scrape off the wax and use a tiny amount of oil or butter to give the eggs a nice shine. We paint our eggs raw, so that if we like any, you can blow them out and hang them on an Easter display.  The process is very hit-and-miss - this year, some years, the eggs don't accept the colour well, others, you scrape a lot off when you scrape the wax off. But each year, there are one or two worth blowing out. Below is our haul from this year, painted by all the family. Toby painted his first egg when he was two years old, and we paint them every year - this year, a day later than normal, because of our holiday. Do you have a special way of painting Easter eggs?
1 Comment
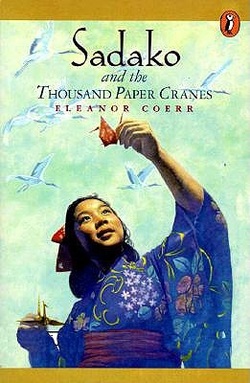 Toby says: It was really sad. Sadako was a little girl, and she had to go to the doctors. She had leukaemia from the atom bomb. She was folding a thousand paper cranes so that she could get better again, but she actually died. I liked the book, it was a sad book, though. There is a statue of Sadako in the Hiroshima Peace Memorial Park in Japan. Mummy says: This was another book that had stayed with me since childhood, and as a result of it, I have been folding paper cranes - out of receipts in restaurants, scraps of paper while we wait somewhere...Toby had been playing with these since he was tiny, and I always told him that I learnt how to fold them because of a book I'd read as a child. What I didn't realise was one important change the author made - when we researched the book, it turned out that Sadako actually managed to fold a thousand paper cranes, but died anyway. In the book, she falls short of her target, and her class mates finish the remaining cranes, so that she gets buried with a thousand paper cranes. Of course, we had to have a go at making a paper crane. With a bit of help, this is Toby's first one :) 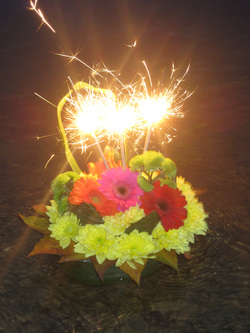 Kung told us about Loy Krathong, a Thai festival that is celebrated in November. For Loy Krathong, people build a krathong - a floating flower display with a candle and joss sticks, which then gets to float away, taking all worries and bad luck with it. Toby loves anything crafty, and with the nights getting longer, the idea of playing with light sounded lovely, too, so we decided to build our own krathong. Traditionally, the base is made from a slice of a banana tree or bread - we decided to use some flower "oasis" (squishy green stuff for flower arrangements), wrapped in cling film. The base gets covered in banana leaf, and then flowers get arranged on top. Ours is not as professional as those we found online, but we had great fun making it. Toby wanted to include some autumn leaves, so we had a whole row of them. Because it is very windy right now here where we live, we decided to put some giant sparklers on, rather than a candle, which would have lasted about half a second.
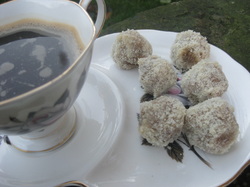 We found a book in the library with recipes from ancient Egypt, and wanted to try these date balls. Apparently, the recipe was found on an ostraca, a shard of pottery used for writing by scribes, and dates back (no pun intended) to 1600BC. Ingredients: 200g pitted dates 100g ground walnuts 1 teaspoon cinnamon 3 tbsp honey small bowl full of ground almonds Warm the honey (don't boil it) and put to one side. Mash the dates and add a bit of water, until you have a thick paste (we think we added a bit too much water, it was hard to get to a "paste" stage). Add cinnamon and walnuts, then shape into small balls. Coat each ball in warm honey and then roll in ground almonds. Serve immediately. We didn't think in advance to build a suitably "ancient Egyptian" background for the photo, sorry! But these are very yummy, and both Toby and Mummy love them. 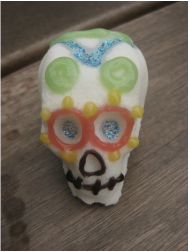 We are always curious to find out what and how other cultures celebrate, so when we discovered that the Latin American community here in Sheffield was running activities for the Day of the Dead, we couldn't wait to take part! There were loads of activities, from decorating sugar skulls to colouring, making masks, making flowers and face painting. Through it all, we learnt how the Day of the Dead is a much happier celebration than we might be used to when it comes to "death"! Once we got home, we continued our exploration and baked "Pan de Muerto", which, we were told, is one of the traditional foods to go hand in hand with the festivities. Here are some pictures, and the recipe we used - enjoy! 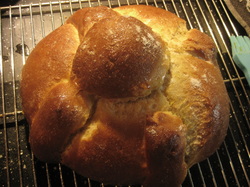 Pan de Muerto INGREDIENTS: 1/4 cup butter 1/4 cup milk 1/4 cup warm water (110 degrees F/45 degrees C) 3 cups all-purpose flour 1 1/4 teaspoons active dry yeast 1/2 teaspoon salt 1/4 cup white sugar 2 eggs, beaten 2 teaspoons orange zest 1/4 cup white sugar 1/4 cup orange juice 1 tablespoon orange zest 2 tablespoons white sugar DIRECTIONS: Heat milk and butter in a saucepan, until the butter melts. Add warm water and take off the heat. In a large bowl combine 1 cup of the flour, yeast, salt, and 1/4 cup of the sugar. Add milk and beat, then add eggs and orange zest and mix well. Add remaining flour until you have a dough you can knead. Turn the dough out onto a lightly floured surface and knead until smooth and elastic. Proof the dough in a covered bowl in a warm place for about an hour, or until doubled in size. Knead again and shape into a large round loaf with a round knob on top. Use additional dough to make bone shapes and decorate around the outside of the loaf. Place dough onto a baking sheet, loosely cover with plastic wrap and let it rise in a warm place for about 1 hour or until just about doubled in size.Bake in a preheated oven at 350 degrees F (175 degrees C) for about 35 to 45 minutes. Glaze: Warm sugar, orange juice and zest in a saucepan. Bring to the poil and boil for two minutes. Brush over bread while it is still warm, and sprinkle with caster sugar. 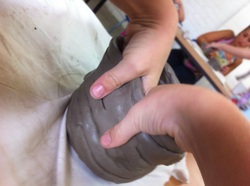 For the past three days, Toby and I have been doing a clay "summer school", lesson number 1: coil pots. When I booked the sessions several months ago, it was because of Toby's interest in all things "to make", but all of a sudden, here we were, exploring the ways in which pots have been made all over the world, for thousands of years. I have to admit that everything we made had to have some sort of fossil either pressed into the clay or attached to it - you may realise from reading the letters that he writes that he is just a teeny tiny bit "into fossils". In other news, three new channels of contacts have opened up, each a rich seam full of lovely people willing to help! At the end of last week, I thought we'd run out of addresses, suddenly, we had a veritable rush on contacts - thank you!! Toby does get excited about every single one of them. |
AuthorThis blog is mainly a way to keep track of our recipes - for day to day updates, please check out Toby's Facebook page: https://www.facebook.com/writingtotheworld Archives
May 2018
Categories
All
|